
Ekey to enter the main menu, see the figure below:

1,if you need to modify the unit, inSYSTEM UNITS,+key selection:
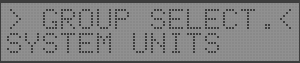
EKey
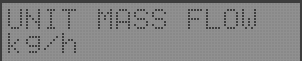
can be found here.+KeyModify Mass Flow Unit, pressEthe key to confirm. If you do not modifyEkey to enter the next parameter

can be found here.+KeyModify Density Units,Modification80, see figure below
 :
:
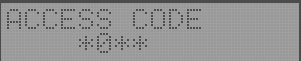
here, press+or-Modify units, pressEthe key to confirm.If you do not modify the density unit, pressEkey to the next parameter.
2, Display Settings: In the main menu, press+key selection menuUSER INTERFACE

EEntry

Set the parameters shown in the first line of the display here, press+key modified to densityDENSITY

Ethe key to confirm, and then pressEkey to the next parameter.

Set the parameters shown in the second line of the display here, press+to Mass FlowMASSFLOW

Ethe key to confirm, and then pressEkey to the next parameter.
3, range setting
(1)First current outputSettingsDensity Output
+or-key to select the menuCURRENT OUTPUT 1
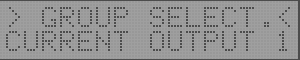
Ekey to enter
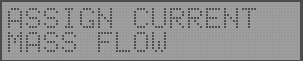
Set Herecurrent output distribution,revisedDENSITYEthe key to confirm.

Ekey to enter the next parameter
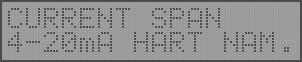
EKey

set here4mA. Press+key to the corresponding value, pressEthe key to confirm.

set here20mA. Press+key to the corresponding value, pressEthe key to confirm.
(2)second current outputSettingsflowoutput-according to the instrument model, some do not have a second current output
|
2 |
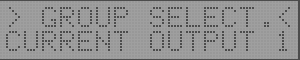
here should readCURRENT OUTPUT 2, pressEkey to enter

EKey
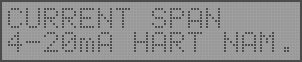
EKey
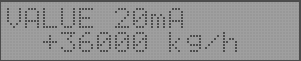
here to set the range, press+or-Modify Range, pressEkey confirmation.
Attention:
lOnly when the user has a good understanding of the density of the fluid, such as accurate and real-time data analyzed in the laboratory, can the on-site density debugging be carried out.
lis corrected by this method, the deviation between the density of the fluid and the density measured by the meter shall not be greater than ±10%, if it is greater than, it can be corrected in two or three steps.
calibration steps:
lEnsure that the measuring tube is filled with medium and there are no bubbles.
lis readded to the medium, it can be corrected only after the temperature of the measuring tube and the medium is consistent.
 1,Ekey to enter the main menu, as shown on the right
 2,+or-key to select the main menu for density correctionPROCESSPARAMETE.
 3,Ekey to enter and keep pressingEuntil the parameter shown on the right appears,DENSITY SET VAL1, here you need to enter the assay density value of the medium.

4,+or-key, the meter prompts you to enter the change password.80, press+or-key input.
 5. Enter the density of the medium as shown on the right, for example, enter the density1000kg/m3. The input range is the density value measured by the meter ±10%.
 6,Ekey confirms the input, the instrument enters the next parameterMEASURE FLUID 1.
7,+or-key selected as startSTART, pressEconfirmation, at this time the instrument showsRUNNINGabout10seconds, the meter measures the current medium density.
8. After the measurement, the instrument returns to the step6,as shown below

PressEkey confirmation,DENSITY ADJUSTparameters,+or-key selectedSTART, pressEthe key to confirm.
willCANCELreadSTART, pressEthe key to confirm. The density correction is complete. Press simultaneously+and-the key to return to measurement mode.