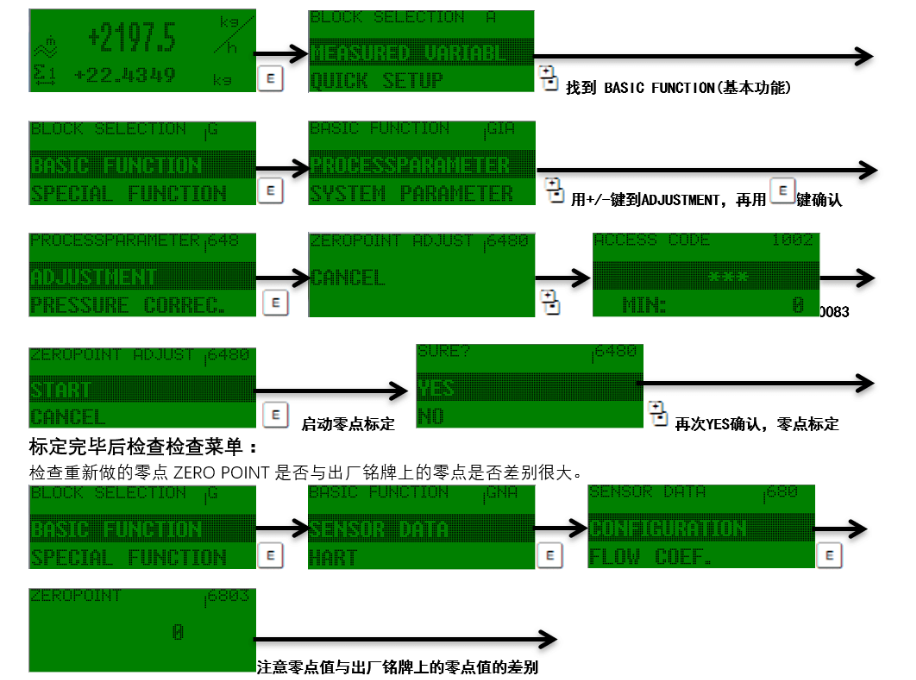
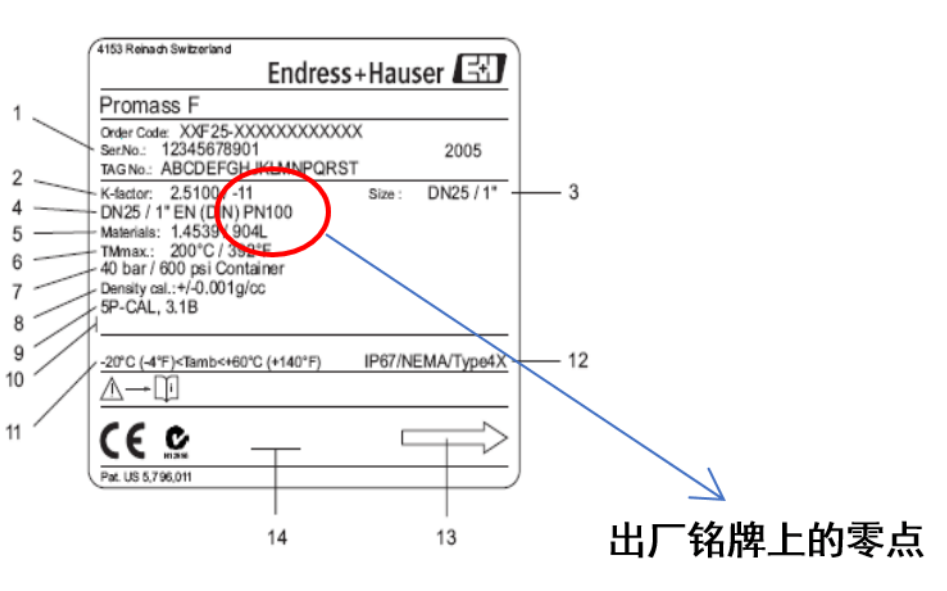
zero calibration process
1. Filled the entire measuring tube with liquid
2. Close the back valve, and then close the front valve. 3. Static for a period of time to ensure that the fluid in the measuring tube is zero (0 m/s)
4. Start zero calibration
Photosensitive touch key control: ",-" key "e" key, press at the same time,-"key step by step to exit the function matrix to the main display page position, press the white key and hold for more than 3 seconds to directly return to the main display page position, and press,-" key to cancel data input. Press "e" to enter the menu, press,-"to find the BASIC FUNCTION (basic function) to change the password: 0083, or directly enter" 83 ". when the third" * "number from left to right becomes enter key, press" e "to confirm.
Note: Before the zero correction, change the small flow cut-off value to zero, so that the zero fluctuation can be seen after the zero correction is completed, and then add the small flow cut-off value. Small Flow Cut Value View the small flow cut function menu table.